RaspberryPi

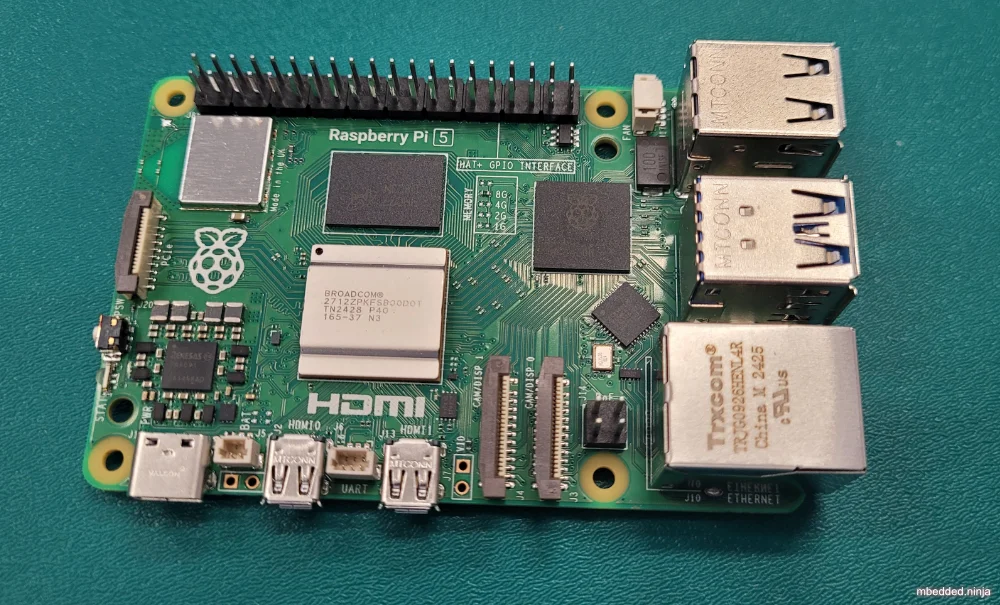
The Raspberry Pi is a family of popular single-board computers (SBCs) originally designed by the Raspberry Pi Foundation.
Cases
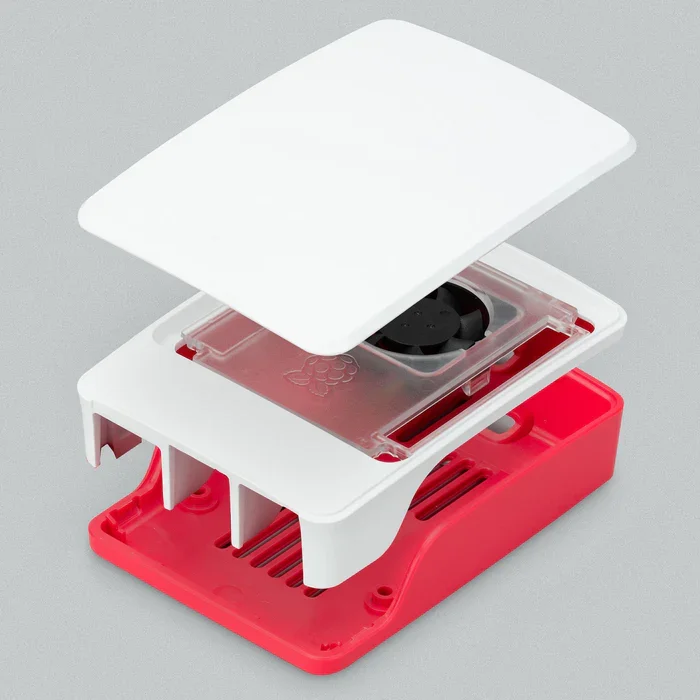
The Raspberry Pi 5 has an official case which contains a small heatsink and fan for active cooling of the CPU. The case is available in red/white or black. It snaps together easily and provides access to all the common features.
In Sep 2025, a new M.2 hat called the “M.2 HAT+ Compact” was released which is compatible with the official enclosure. This hat is a more compact version of the original M.2 hat, which supports 2230-format (30mm long) M.2 PCI express cards.2 This hat is great for installing NVMe drives which offer better performance and reliability for the boot file system than the SD card slot or a USB thumb drive.

Quick Setup
Raspberry Pi Imager
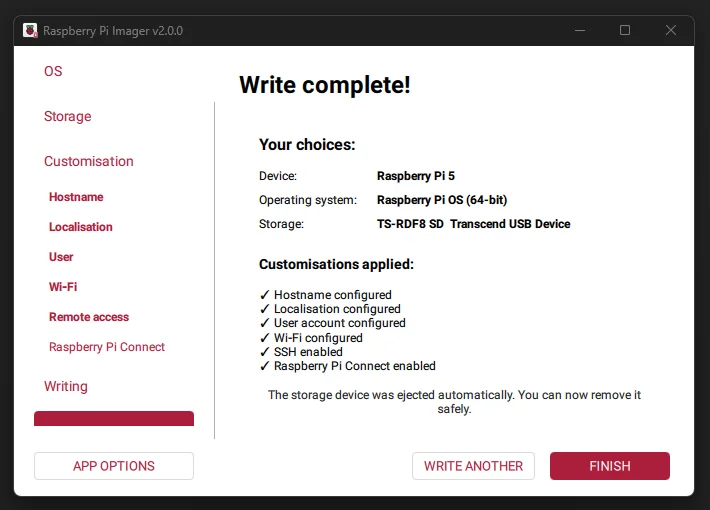
The Raspberry Pi Imager is a desktop GUI tool that allows you to easily write operating system images from a Raspberry Pi to an SD card. It runs on Windows, macOS and Linux. As of December 2025 it is the recommended way to write OS images to an SD card and is at version 2.0.2.
Older Setup Methods
www.raspberrypi.com has released software called NOOBS (new out-of-the-box software), which makes it really easy to setup the RPi. Just download NOOBS (which was just over 1GB at v1.2.1), format (go here) then unpack NOOBS onto the SD card, and you’re good to plug the SD card into the RPi and power up (NOOBS will present you with various operating systems to install on start-up).
At the bare minimum, you’ll also need a USB keyboard, mouse (hard-outs may be able to forgo this) and either an HDMI or composite screen.
| Default username: | pi |
| Default password: | raspberry |
Longer Setups
You can also write images directly to the SD card. The recommended tool for this is the open source program Win32DiskImager.
Operating Systems
There are many operating systems that are compatible with the RPi.
A list of some of the supported operating systems and downloads for them can be found here.
Occidentalis
A port of the Raspbian OS by Adafruit industries which makes the OS more hacker friendly. It provides hardware SPI and I2C support, Realtek RTL8188CUS WiFi support (a common chipset used in USB WiFi modules).
Pidora
URL: http://pidora.ca/
Pidora is a mod of Fedora for the RPi.
Raspbian
A Debian-based (Ubuntu-like) operating system optimised for running on the RPi. It is one of the most popular operating systems for the RPi. Provides a config menu the first time you boot, where you can change settings such as the password, enabling SSH, expanding the file system to use the entire SD card, and configuring the keyboard/mouse.
You can bring up the config menu at any time by typing the command sudo raspi-config.
To load up the GUI from the command-line, type startx.
To shutdown the GUI from the command-line, type sudo shutdown "now" (this also shuts down any other processes).
The nano text editor comes pre-installed, type nano to load it.
RISC OS
URL: https://www.riscosopen.org/wiki/documentation/show/Welcome%20to%20RISC%20OS%20Pi
A version of the RISC OS (an operating system dating back to 1987 for 32-bit ARM chips) for the RPi.
Music Orientated
Pi MusicBox
| Supported Music Sources |
|
| Supported Platforms | Raspberry Pi |
| Structure | Mopidy (which itself is MPD) |
| Licensing | Open Source |
Volumio
| Supported Music Sources | Apple Airplay |
| Supported Platforms |
|
| Licensing | Open Source |
Comments:
Volumio began as the RaspyFi project in December 2012. It then expanded to support many embedded platforms including the Udoo and BeagleBoard. IMO, Volumio looks more polished than the Pi MusicBox.
RPi Store
There is an official RPi store that offers applications and games (some cost, some are free) for the RPi.
Video Output
The RPi has two native video outputs, HDMI, and RCA/composite. You cannot use both at the same time. Converting any of these two to VGA is rather expensive.
DSI
The RaspberryPi also has a DSI output connector (the 15-pin connector that is not on the edge of the board), which is a high-speed, differential, serial point-to-point bus designed by the mobile industry to connect a host controller up to a graphics display device (normally an LCD screen). However, it is very difficult to use these on the RaspberryPi, as the pins are controlled by the GPU, which is controlled by closed software written by Broadcom. I don’t know of anyone who has managed to connect anything to this 15-pin connector!
Controlling The GPIO
Understanding Outputs explains the GPIO pins on the RaspberryPi really well.
Check out the Quick2wire Python API repo, this allows you to control the RPi’s GPIO from a python script.
There is also the pi-gpio module for controlling GPIO with nodejs. Good for when you are wanting to control the RPi GPIO from across a network (remotely).
PWM
The RPi has one hardware PWM output (yes, only one, this isn’t a microcontroller). Unfortunately this is shared with the audio system, so you can’t use the PWM and listen to audio through the 3.5mm jack at the same time. Other GPIO can be bit-bashed with software PWM.
How To Change Keyboard Layout
The default keyboard layout is British, so you might find yourself getting a pound sign when you really want a dollar sign (and other quirky differences). To change the keyboard mapping, open the file etc/default/keyboard with a text editor like nano.
Updating
Assuming you have an internet connection, run:
sudo apt-get updatesudo apt-get upgradeSSH
You can log into a RaspberryPi from another computer using SSH. Type the following command into a terminal:
ssh 192.168.1.100 -l piwhere you replace 192.168.1.100 with the IP address of the Raspberry Pi (this is the RaspberryPi’s local address, which is only accessible via another computer on the intranet). The flag -l pi tells SSH to login with the username pi, not the default username of the calling terminal.
Raspberry Pi Connect
Raspberry Pi Connect is a remote control tool for the Raspberry Pi that allows you to control the Raspberry Pi from another computer using a web browser. It supports both screen sharing and terminal access. It is provided by the Raspberry Pi Foundation and is free for personal use (you can also setup Organisations which give you unlimited users for US$0.50 per device per month as of December 2025). You can setup Raspberry Pi Connect when you create an image using the Raspberry Pi Imager. This will create an auth key that will be used for authentication.
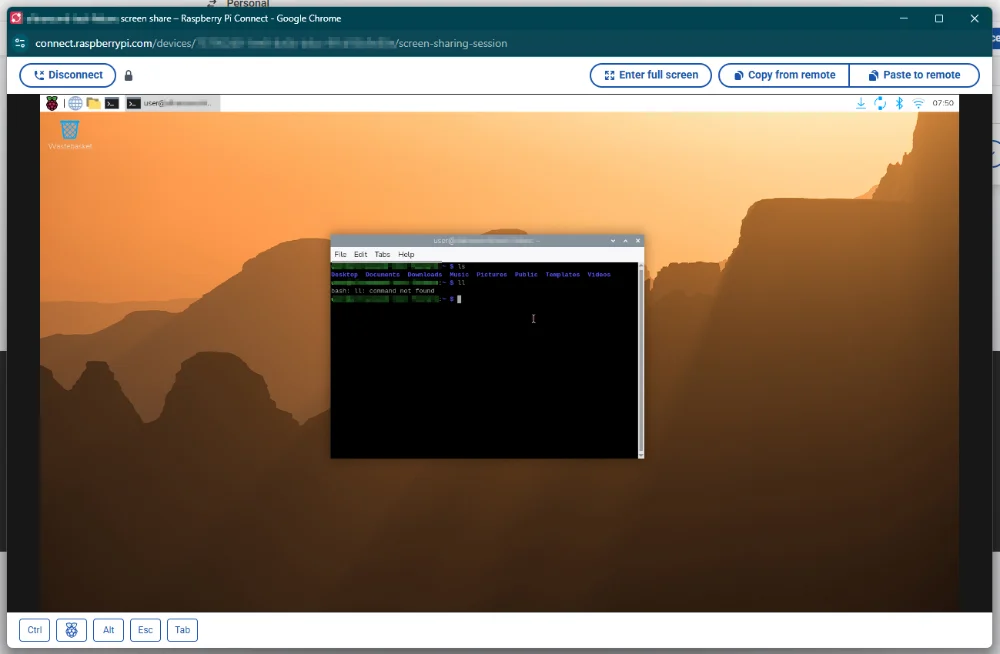
If you only want terminal access, SSH from a local terminal is usually a better option than Raspberry Pi Connect because the native terminal experience is better than using a web browser terminal. But Raspberry Pi Connect is still a great tool for quick terminal access (as it doesn’t require you to remember any credentials except your login to Raspberry Pi Connect).
Useful Packages To Install
# git to manage git repositoriessudo apt-get install git
## Advanced make-like compilersudo apt-get install scons
## GCC/G++ compilers and additional toolssudo apt-get install build-essential
## C++ wrapper for the perl-compatible regex engine (PCRE)sudo apt-get install libpcre++-dev
## API for XUL embedders and Gecko applications (the main engine for Mozilla# programs such as Firefox)sudo apt-get install xulrunner-dev
## The boost librarysudo apt-get install libboost-dev libboost-program-options-dev libboost-thread-dev libboost-filesystem-dev
Node.js
Node.js will work with the hard-float version of Raspbian Wheezy. It takes aggggeeeesss to compile from the source code, but luckily, there is a pre-compiled binary available for the ARM processor which will work on the RaspberryPi.
You can install Node.js on Wheezy by just typing sudo apt-get install nodejs. See below for the harder way.
sudo mkdir /opt/nodewget http://nodejs.org/dist/v0.10.2/node-v0.10.2-linux-arm-pi.tar.gztar xvzf node-v0.10.2-linux-arm-pi.tar.gzsudo cp -r node-v0.10.2-linux-arm-pi/* /opt/nodeThen Node.js has to be added to your PATH variable, to do this, type
nano /etc/profileAnd add the following lines before the export variable
...NODE_JS_HOME="/opt/node"PATH="$PATH:$NODE_JS_HOME/bin"export PATH...This great tutorial on the Kitware blog easily explains how to remotely access the RPi using nodejs. Once you have installed Node.js, it also pays to install npm (node package manager), by typing:
sudo apt-get install npmPlaying An MP3 Through The Audio Jack
You can use the omxplayer program to play mp3’s from the RaspberryPi:
omxplayer -o local path_to_sound.mp3If you want to loop a single sound file, you can add the option --loop:
omxplayer -o local --loop path_to_sound.mp3Uses
Education
The RPi is great for educating people about computers, as it is cheap and readily available.
Home Automation
QW Home Automation
Website: http://qwhomeautomation.com/ Works with Insteon products.
Footnotes
-
The Pi Hut. Raspberry Pi 5 Case [product page]. Retrieved 2025-12-19, from https://thepihut.com/products/raspberry-pi-5-case. ↩
-
Eben Upton (2025, Sep 22). News > M.2 HAT+ Compact on sale now at $15 [news]. Raspberry Pi. Retrieved 2025-12-19, from https://www.raspberrypi.com/news/m-2-hat-compact-on-sale-now-at-15/. ↩
-
The Pi Hut. Raspberry Pi M.2 HAT+ Compact [product page]. Retrieved 2025-12-19, from https://thepihut.com/products/raspberry-pi-m-2-hat-compact. ↩