macOS

iTerm2
Better Command-Line Editing
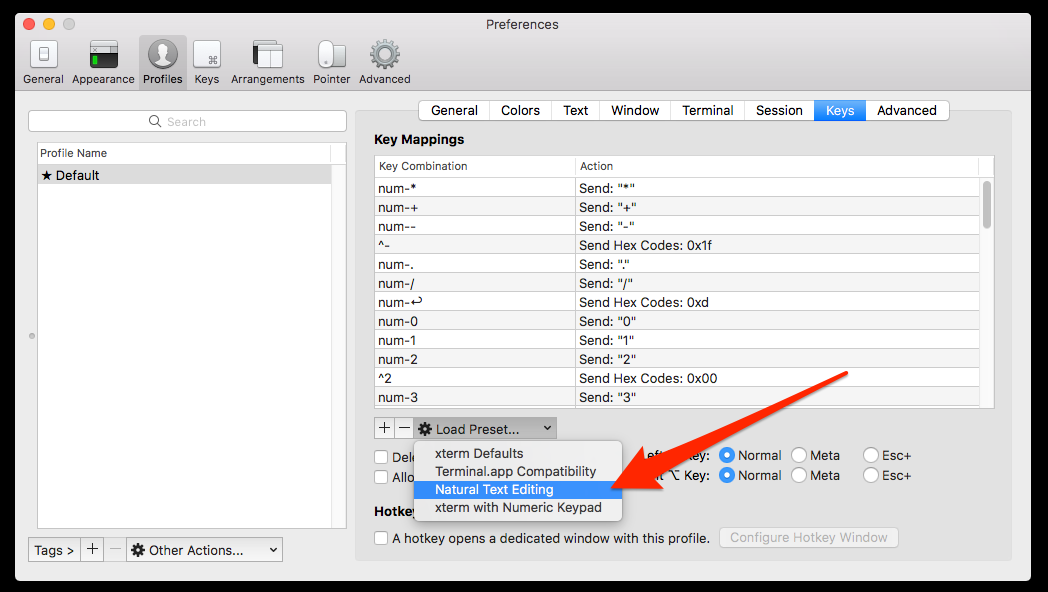
Enable “Natural Text Editing” in iTerm2 to incorporate typical macOS-style text editing shortcodes into the command-line prompt. Two of the most useful commands enabled by this feature is the ability to jump forwards and backwards through words/arguments on the command-line with Alt-Left Arrow and Alt-Right Arrow.
To enable Natural Text Editing, click iTerm2->Preferences->Profiles->Keys. Then click Load Preset, and select Natural Text Editing from the dropdown.
Clearing The Buffer
To clear iTerm’s scrollback buffer, you can enter the following command:
printf '\e]50;ClearScrollback\a'This is useful when you want you are expecting to search stdout but don’t want previous results corrupting the search. It is also useful for increasing responsiveness when the scrollback buffer becomes large (especially if imgcat has been used). The commands clear, reset and Ctrl-K, while clearing the screen, will not clear the scrollback buffer.
imgcat
Images can be displayed inline in a terminal with iTerm2’s imgcat script.
$ imgcat my_image.pngThere is also a 3rd party tool under the same imgcat name which provides similar functionality at https://github.com/eddieantonio/imgcat.
tmux Integration
iTerm2 supports very powerful integration with tmux.
To start a tmux session that is integrated into iTerm2, first be running a terminal inside iTerm2, and then add -CC to your tmux invocation:
tmux -CCOnce the tmux session has been started inside iTerm2, you can then also use standard iTerm2 shortcuts to open new tmux windows, tabs or split panes.
Cmd-t: Open new tabCmd-n: Open new windowCmd-d: Split verticallyCmd-Shift-d: Split horizontally
Showing Hidden Files
By default, Finder in macOS hides all files and folders which begin with .. To configure Finder to show hidden files, type the following at the macOS command prompt:
defaults write com.apple.finder AppleShowAllFiles TRUEkillall FinderThis has been confirmed to work with macOS Mojave v10.14.6.