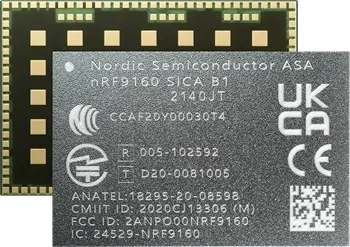
nRF91 Series

The nRF91 Series is a family of wireless SiPs (system-in-packages) by Nordic Semiconductor that feature an integrated low-power LTE-M/NB-IoT modem and GNSS. They include a 64MHz Arm Cortex-M33 CPU dedicated for application processing (the modem has its own CPU).
The following SiPs are available in this series:
- nRF9131
- nRF9151
- nRF9160
- nRF9161
All SiPs in this family come with 1MB of NVM and 256kB of RAM.
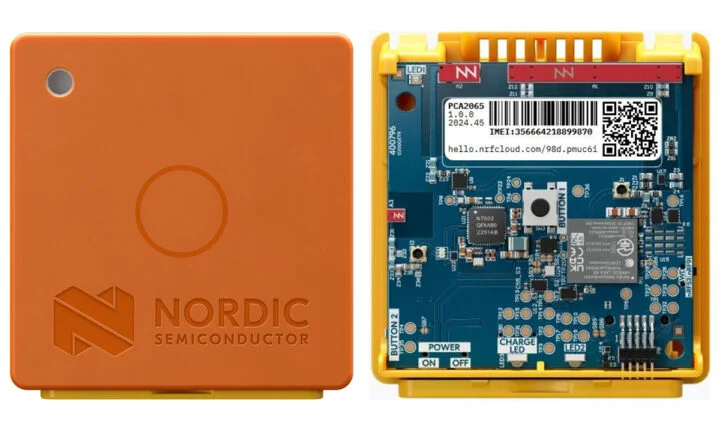
The Nordic Thingy:91 X (shown in This is a placeholder for the reference: fig-nordic-thingy-91-x-case-and-pcb-photo) is a development kit that features the nRF9151 SiP (which provides cellular connectivity). It also has a nRF5340 SoC for USB and Bluetooth LED, and a nRF7002 companion IC for WiFi.2
The nRF91 series has good support for using the Zephyr framework to develop the firmware, as is officially backed by Nordic Semiconductor. Zephyr provides a RTOS, peripheral drivers and utility API. There are many project examples and guides available for using Zephyr with the nRF91.
AT Commands
The nRF91 SiP modems support AT commands for configuration and control.
Identification
There are a number of commands that can be used to identify the manufacturer, model, revision, e.t.c of the modem. Some are standard AT commands (using +) and others are proprietary (using %).
Use AT+CGMI to get the manufacturer (Manufacturer Identification).
AT+CGMINordic Semiconductor ASAOKUse AT+CGMM to get the model (Modem Model).
AT+CGMMnRF9151-LACAOKUse AT+CGMR to get the revision (Modem Revision).
AT+CGMRmfw_nrf91x1_2.0.2OKUse AT%SHORTSWVER to get the short software identification:
AT%SHORTSWVER%SHORTSWVER: nrf91x1_2.0.2OKUse AT%HWVERSION to get the hardware version:
AT%HWVERSION%HWVERSION: nRF9151 LACA A0AOKOfficial documentation for these commands can be found here.
Credentials
AT%CMNG (credential management) is used to manage the credentials used by the modem. This includes reading and writing keys and certificates. AT%CMNG=1 can be used to list all available credentials.
Tags are used to group related credentials together. The idea is that you store related credentials (e.g. root certificate, device certificate, and device private key) under the same tag. The default tag for nRF Cloud credentials is 16842753. Under each tag another number called the type is used to identify the type of credential.
Note that when managing credentials, the modem must be in the offline state (otherwise the modem will not accept the commands and you will get back an ERROR response).3 To set the modem in the offline state, use:
AT+CFUN=4To check if the modem is in the offline state, use AT+CFUN?.
Listing Credentials
Run AT%CMNG=1 to list all credentials. You should see output like that shown below:
mosh:~$ AT%CMNG=1%CMNG: 1001,0,"5D550643B6400D4341550A9B14AEDD0B4FAC33AE5DEB7D8247B6B4F799C13306"%CMNG: 1002,0,"2C43952EE9E000FF2ACC4E2ED0897C0A72AD5FA72C3D934E81741CBD54F05BD1"%CMNG: 1003,0,"39FDCF28AEFFE08D03251FCCAF645E3C5DE19FA4EBBAFC89B4EDE2A422148BAB"%CMNG: 4294967292,11,"672E2F05962B4EFBFA8801255D87E0E0418F2DDF4DDAEFC59E9B4162F512CB63"%CMNG: 4294967293,10,"2C43952EE9E000FF2ACC4E2ED0897C0A72AD5FA72C3D934E81741CBD54F05BD1"%CMNG: 4294967294,6,"409D1FEC20D53135CF03DEA2073B77EB94ED1B28566EC912D161FC5A5B265746"OKThe output format shows the tag, type, and certificate hash (in that order).
Writing Credentials
To write a certificate, use AT%CMNG=0,<sec_tag>,<type>,"<certificate>".
<type> is the type of credential to write. The following types are supported:
0- Root CA certificate1- Device certificate2- Device private key
<certificate> is the certificate from a .pem file, enclosed in quotes. Within the quotes, new lines are supported, are are not interpreted as the “end of command” as they usually would. This means to can paste the literal contents of the file into the command.
For example, to write a root CA certificate to tag 16842753, run:
AT%CMNG=0,16842753,0,"-----BEGIN CERTIFICATE-----MIIDjjCCAnagAwIBAgIQAzrx5qcRqaC7KGSxHQn65TANBgkqhkiG9w0BAQsFADBhMQswCQYDVQQGEwJVUzEVMBMGA1UEChMMRGlnaUNlcnQgSW5jMRkwFwYDVQQLExB3d3cuZGlnaWNlcnQuY29tMSAwHgYDVQQDExdEaWdpQ2VydCBHbG9iYWwgUm9vdCBHMjAeFw0xMzA4MDExMjAwMDBaFw0zODAxMTUxMjAwMDBaMGExCzAJBgNVBAYTAlVTMRUwEwYDVQQKEwxEaWdpQ2VydCBJbmMxGTAXBgNVBAsTEHd3dy5kaWdpY2VydC5jb20xIDAeBgNVBAMTF0RpZ2lDZXJ0IEdsb2JhbCBSb290IEcyMIIBIjANBgkqhkiG9w0BAQEFAAOCAQ8AMIIBCgKCAQEAuzfNNNx7a8myaJCtSnX/RrohCgiN9RlUyfuI2/Ou8jqJkTx65qsGGmvPrC3oXgkkRLpimn7Wo6h+4FR1IAWsULecYxpsMNzaHxmx1x7e/dfgy5SDN67sH0NO3Xss0r0upS/kqbitOtSZpLYl6ZtrAGCSYP9PIUkY92eQq2EGnI/yuum06ZIya7XzV+hdG82MHauVBJVJ8zUtluNJbd134/tJS7SsVQepj5WztCO7TG1F8PapspUwtP1MVYwnSlcUfIKdzXOS0xZKBgyMUNGPHgm+F6HmIcr9g+UQvIOlCsRnKPZzFBQ9RnbDhxSJITRNrw9FDKZJobq7nMWxM4MphQIDAQABo0IwQDAPBgNVHRMBAf8EBTADAQH/MA4GA1UdDwEB/wQEAwIBhjAdBgNVHQ4EFgQUTiJUIBiV5uNu5g/6+rkS7QYXjzkwDQYJKoZIhvcNAQELBQADggEBAGBnKJRvDkhj6zHd6mcY1Yl9PMWLSn/pvtsrF9+wX3N3KjITOYFnQoQj8kVnNeyIv/iPsGEMNKSuIEyExtv4NeF22d+mQrvHRAiGfzZ0JFrabA0UWTW98kndth/Jsw1HKj2ZL7tcu7XUIOGZX1NGFdtom/DzMNU+MeKNhJ7jitralj41E6Vf8PlwUHBHQRFXGU7Aj64GxJUTFy8bJZ918rGOmaFvE7FBcf6IKshPECBV1/MUReXgRPTqh5Uykw7+U0b6LJ3/iyK5S9kJRaTepLiaWN0bfVKfjllDiIGknibVb63dDcY3fe0Dkhvld1927jyNxF1WW6LZZm6zNTflMrY=-----END CERTIFICATE-----"Deleting Credentials
Run AT%CMNG=3,<tag>,<type> to delete a credential. For example, to delete device certificate (<type> = 1) stored at tag 16842753, run:
AT%CMNG=3,16842753,1OKThe command will return ERROR if not certificate existed at the location or if it cannot be deleted. Certificate and key files in .pem format usually contain around 1000-2000 characters (the root certificate I was looking at was 1300 or so).
Starting the Modem
To initialize the modem library and turn on the modem, use:
int err = nrf_modem_lib_init();__ASSERT(err == 0, "Failed to initialize modem.");Nordic documentation for this function can be found here.
You can use AT_MONITOR() to listen for AT commands from the modem.
AT_MONITOR(mosh_at_cmd_mode_handler, ANY, at_cmd_mode_event_handler, PAUSED);AT Shell Commands
You can enable AT shell commands with:
CONFIG_AT_SHELLHowever, this does not provide the at_cmd_mode command. To get this, you manually have to add it. The best way is to copy the model_shell sample project and modify it.
Modem Firmware
The modem firmware for the nRF91 SiP is a separate binary to the application firmware. The modem firmware can be downloaded from here.
nRF9151-DK Getting Started Guide
Install the nRF Connect for VS Code extension to VS Code.
Install the most recent SDK and toolchain. As of Feb 2025, these were both at version v2.9.0.
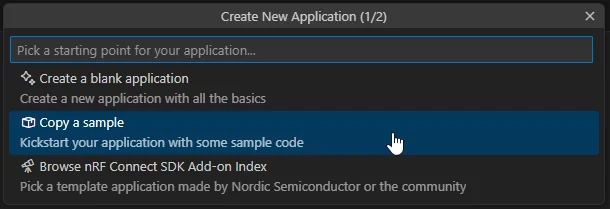
From with the nRF Connect extension, click “Create a new application” and then click “Copy a sample” as shown in This is a placeholder for the reference: fig-nrf-connect-vs-code-create-new-application-from-sample.
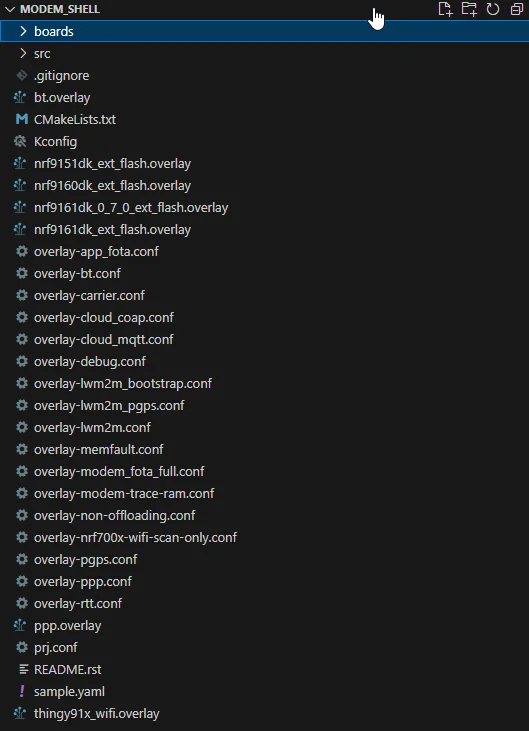
Then select the SDK you just downloaded as the SDK to select the sample from. Then search and click on the “modem_shell Sample”. This should bootstrap you into a new project. You should see a directory structure like that shown in This is a placeholder for the reference: fig-modem-shell-project-files-vs-code. We choose the “modem_shell” sample as it provides useful AT commands through the Zephyr shell.
Now you need to add a build configuration before you can build it.
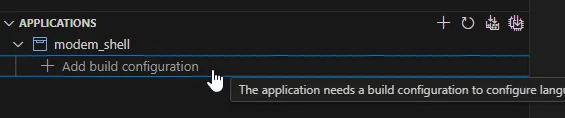
The only thing you need to change on the “Build configuration” page is the board. Select the appropriate dev. kit as shown in This is a placeholder for the reference: fig-modem-shell-build-configuration.
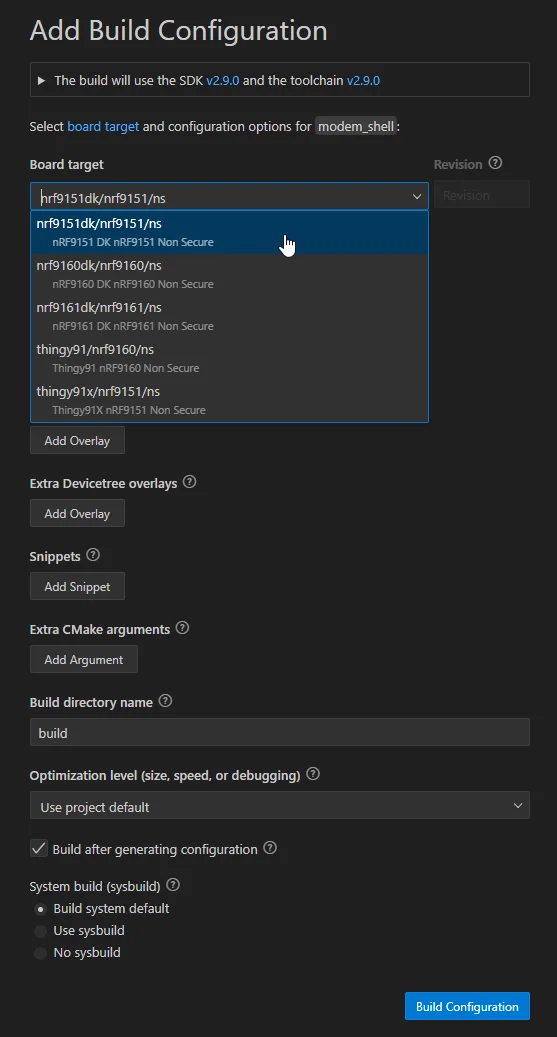
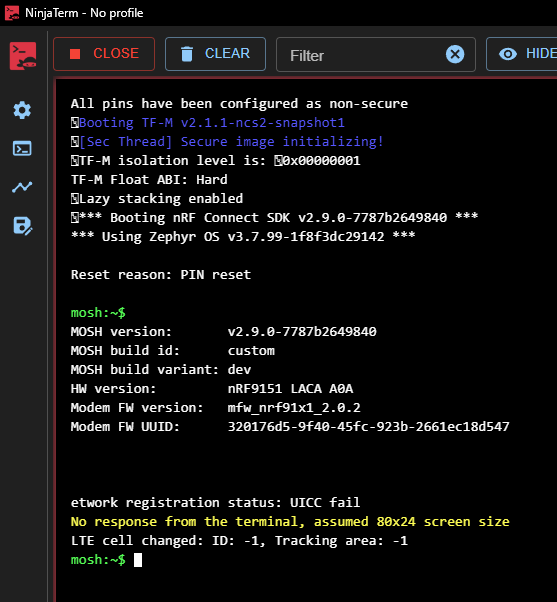
Then hit the big blue “Build Configuration” button at the bottom. All going well, your project should build successfully. Connect your dev. kit to your computer via USB, and then you should be able to program the dev. kit with this firmware. Also, make sure to connect a terminal to the dev. kits other serial port that should be enumerated when the cable is plugged in (one is used for programming, the other as the serial console). All going well, you should see output like that shown in This is a placeholder for the reference: fig-modem-shell-output-in-ninjaterm (captured in NinjaTerm).
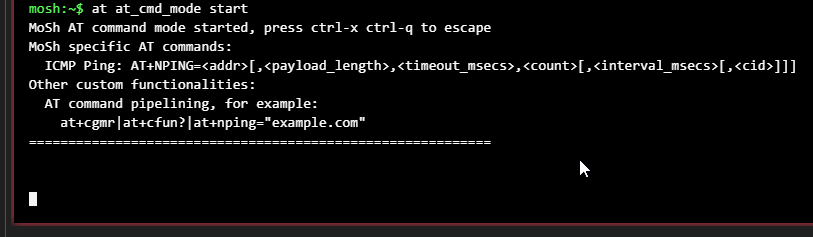
The model shell example includes the command at to forward commands to the modem. There is also an “AT command mode” so that you can send AT commands directly without having to prefix them with at. To enter AT command mode, type at at_cmd_mode start as shown in This is a placeholder for the reference: fig-at-command-mode-from-terminal. Press Ctrl-x, Ctrl-q to exit AT command mode.
Using the command west flash --runner jlink to program the nRF9151 on Linux (on WSL) using JLink v7.94i would cause the pop-up shown in This is a placeholder for the reference: fig-j-link-unknown-device-nrf9151-pop-up to appear (presumably JLink v7.94i was not new enough to support the nRF9151).
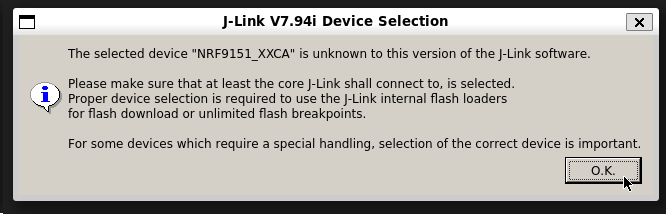
If this happens, and you know that there is a recognized device which will work, you can click OK and a modal will show in which you can select the device. This gets old fast though when programming the SoC during development. Instead, you can specify the SoC with the --device option. In the above example, I knew pretending to be the nRF9160 worked ok, so I could use:
west flash --runner jlink --device nrf9160Footnotes
-
Nordic Semiconductor. nRF9160 - System-in-Package - Low power SiP with integrated LTE-M/NB-IoT modem and GNSS [product page]. Retrieved 2025-02-12, from https://www.nordicsemi.com/Products/nRF9160. ↩
-
CNX Software (2024, Dec 15). Nordic Thingy:91 X multi-sensor cellular IoT platform combines nRF9151 LTE IoT SiP, nRF5340 BLE SoC, and nRF7002 WiFi 6 IC [article]. Retrieved 2025-02-19, from https://www.cnx-software.com/2024/12/15/nordic-thingy91-x-multi-sensor-cellular-iot-platform-combines-nrf9151-lte-iot-sip-nrf5340-ble-soc-and-nrf7002-wifi-6-ic/. ↩ ↩2
-
Nordic Semiconductor (2025, Jan 8). Cellular Monitor app > Managing modem credentials [documentation]. Retrieved 2025-02-18, from https://docs.nordicsemi.com/bundle/nrf-connect-cellularmonitor/page/managing_credentials.html. ↩