How To Unbrick A PICkit 3
| Date Published: | |
| Last Modified: |
Overview
You can quite easily brick a PICkit3 when using it with the buggy standalone apps Microchip has written (especially when attempting to download the standalone OS to it). Here is how to unbrick a unresponsive PICkit3.
You Will Need
Aside from the bricked PICkit3 you a trying to fix, you will also need:
- A working PICkit3 to program the bricked PICkit3 with.
- A standard 6-pin, 2.54mm header strip and some small bits of wire for converting
J2on the bricked PICkit3 into a something we can program with the working PICkit3 - The standalone PICkit3 v3.01 or similar application written by Microchip that allows you to program with the PICkit3 (it also provides the hex file we will be downloading to the bricked PICkit3).
Unbricking Steps
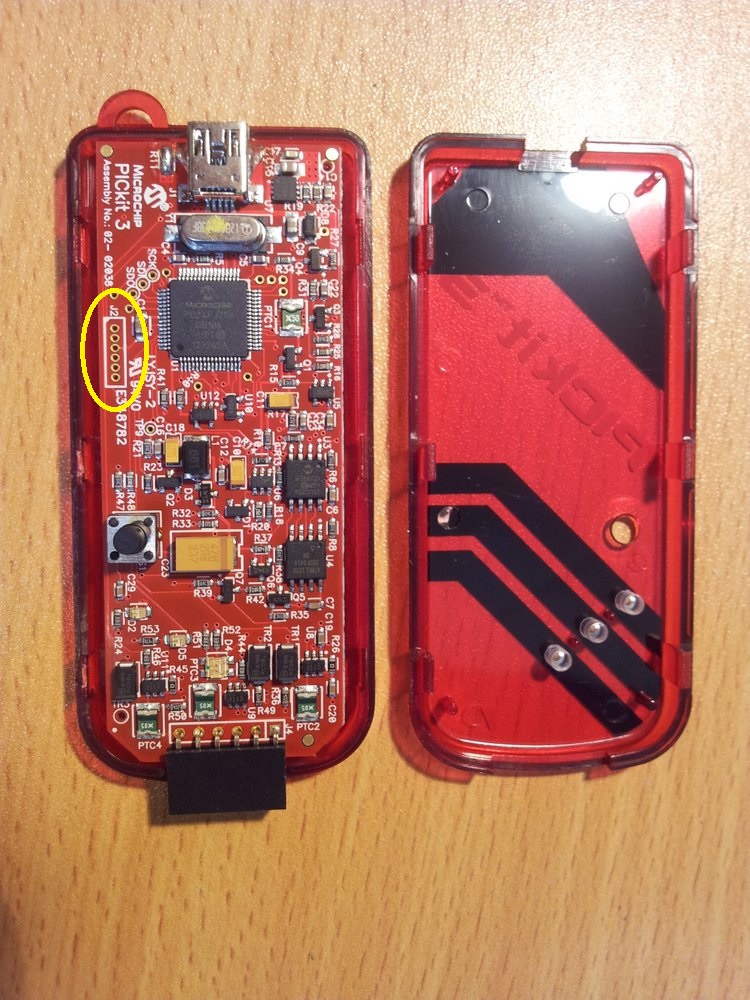
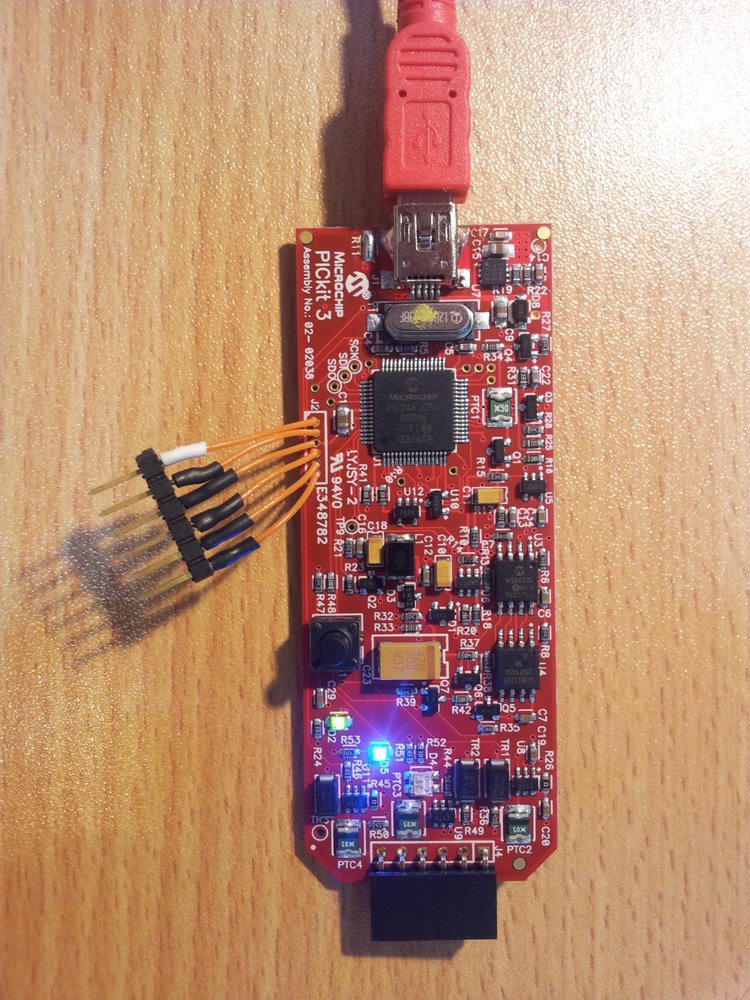
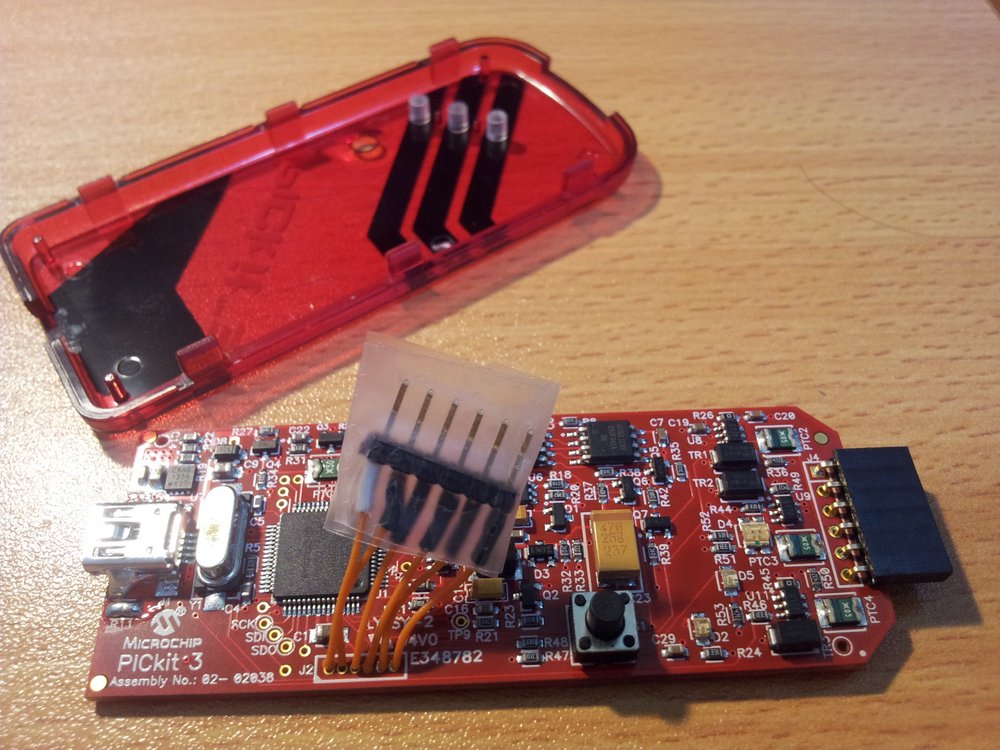
Remove the PCB from the PICkit 3 enclosure. The connections we are interested in for programming a those circled in yellow (J2).
The exact PICkit3 I had contained the text
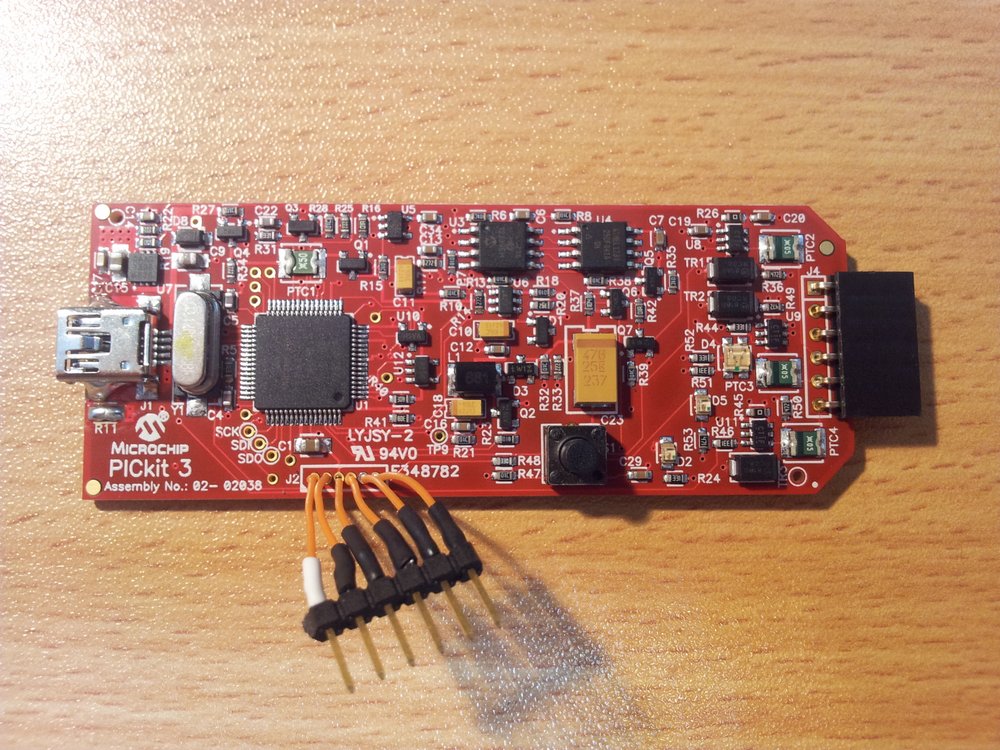
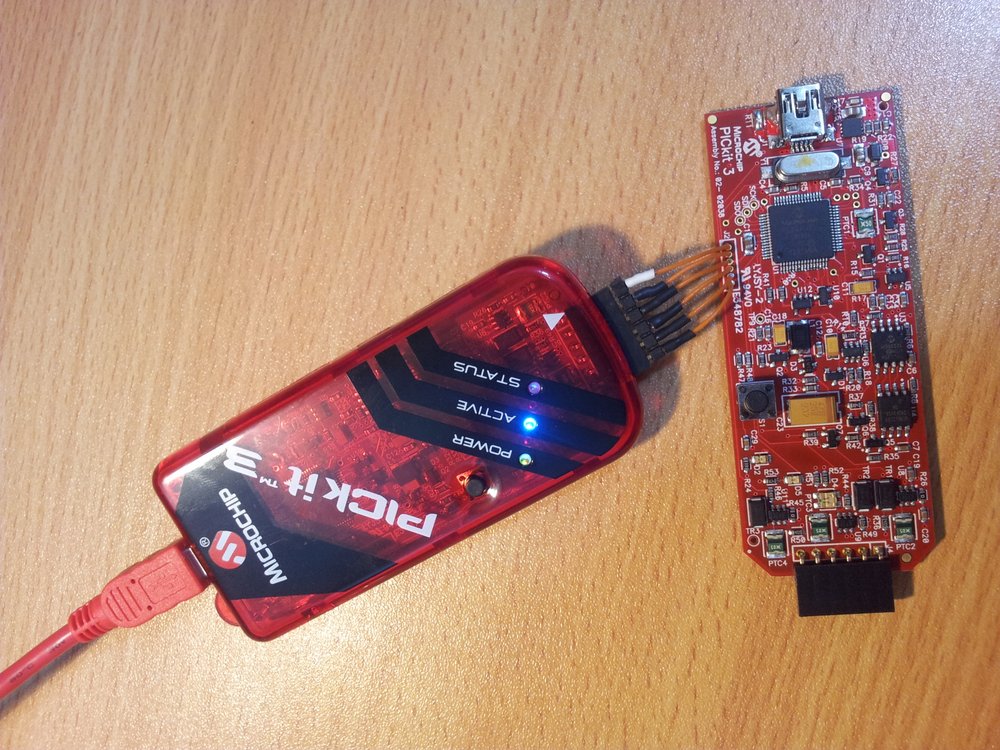
Microchip PICkit 3 Assembly No. 02-02038(on the top side) and04-02038 REV C(on the bottom side). Solder a 6-pin 2.54mm pitch male header with wires onto the header J2 (unfortunately you can’t solder it directly on, as it is the wrong pitch). Notice that the silkscreen for J2 has a little notch a one end indicating pin 1.Connect a working PICkit3 to this header, noting that pin 1 on the programmer (the working PICkit3), which is the white arrow, matches up with the white notch on header J2 on the bricked PICkit3.
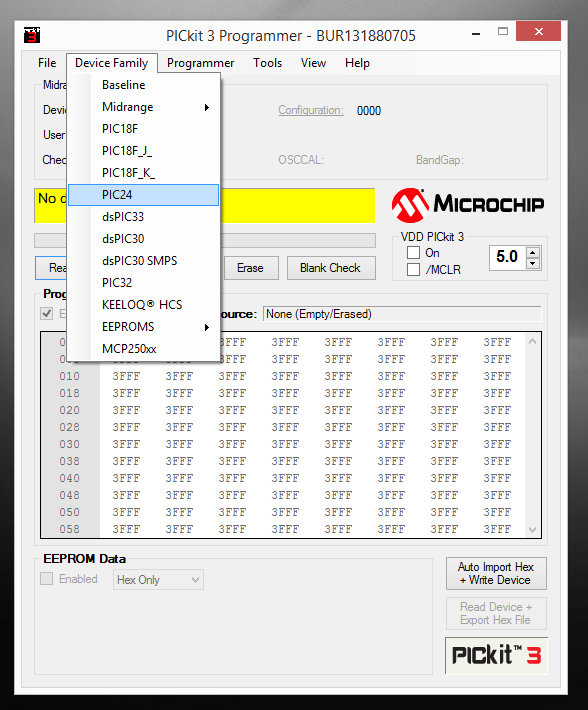
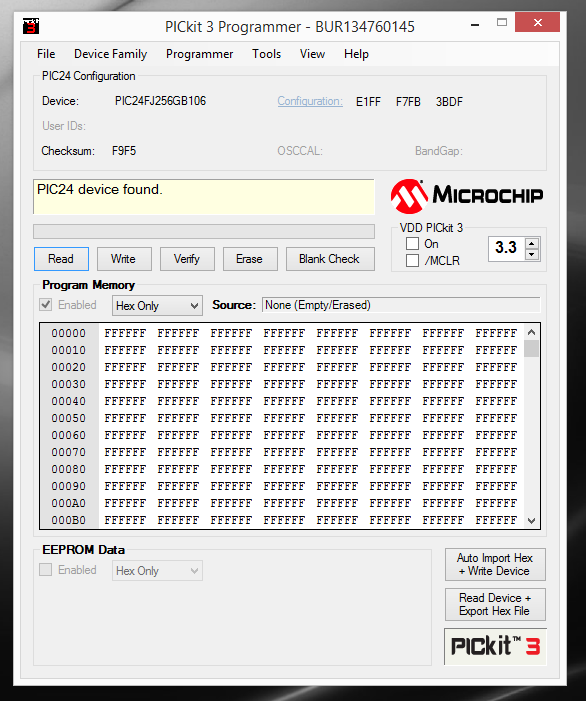
Load up the stand-alone PICkit 3 v3.01 programmer application. The microcontroller inside the PICkit3 is the
PIC24FJ256GB106-I/PT, so you have to selectPIC24from theDevice Familymenu.Once connected, you should see something like this…
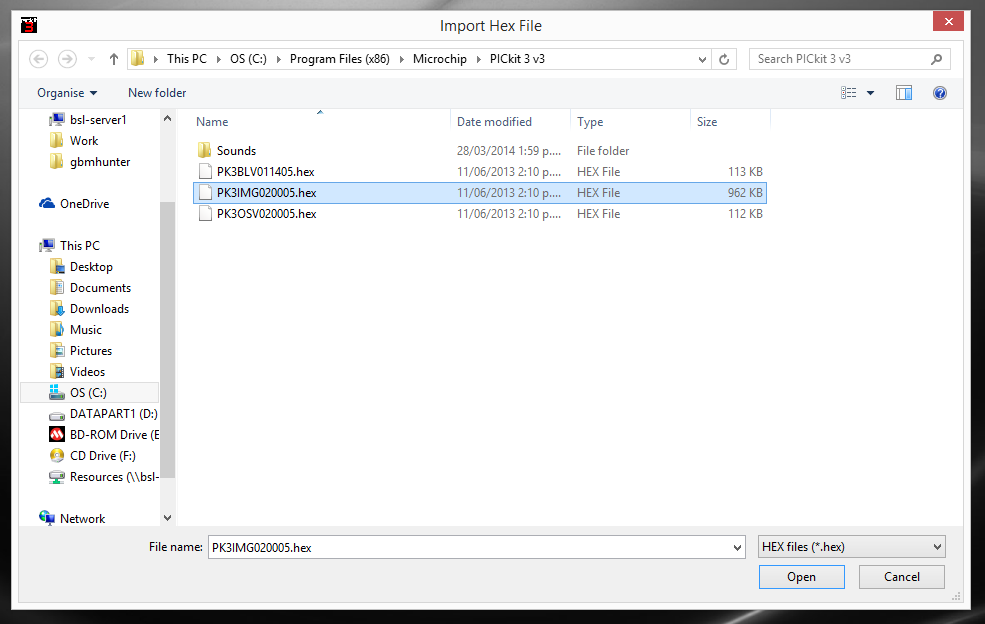
Now you have to select the PICkit3 firmware to upload to the bricked PICkit3. Select
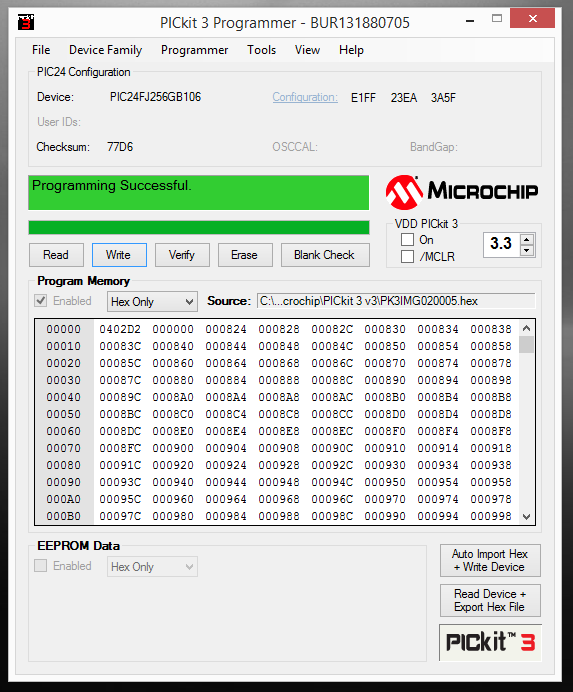
File->Import Hexand then select the filePK3IMG020005.hexwhich should be inC:\Program Files (x86)\Microchip\PICkit 3 v3\or similar (on Windows). Note that the PICkit 3 software has to be installed for this file to be present (as per the requirements above).The hex file should be about 962KB in size.Hit “Write”. It could take up to 20s to program, and appear to freeze, but don’t worry, you should end up seeing something like this…
The PICkit 3 should now be unbricked!
If you want to keep the programming header attached just in case it happens again, I suggest wrapping tape around the header so that you don’t cause any shorts.
The unbricked PICkit3 can now be put back in its case!
Authors


This work is licensed under a Creative Commons Attribution 4.0 International License .